Python Web development tutorial using Flask
In this tutorial, we are going to learn web development with Python using the Flask framework. We have already learned about routing and basic requirements of the flask setup earlier, if you have not read then check out this.
So now you have learned the basic and routing tutorial of web development using flask lets start learning about – url building, rendering template, http methods by importing these render_template, request, redirect, url_for from flask.
Create file “app.py” and write down below code:-
from flask import Flask, render_template, request, redirect, url_for

app = Flask(__name__)

# homepage
@app.route('/')
def home():
    return "Welcome to TechLifediary Home!"

# form this will render a template form.html
@app.route('/form')
def form():
    return render_template('form.html')

# submit form
@app.route('/submit', methods = ['POST'])
def submit():
    input = request.form
    return render_template('user.html',data = input)

# redirection
@app.route('/user/<type>')
def user(type):
    if type == 'form':
        return redirect(url_for('form'))
    if type == 'home':
        return redirect(url_for('home'))

if __name__ == "__main__":
    app.run(debug = True)
render_template is used to render any html file.
request.form will pass the array of form data in input, and this is used to accept the form data.
url_for will create the URL for the value you passed in it, we create a static URL in the below form.html by passing two-parameter static, filename.
@app.route('/submit', methods = ['POST']) / In this line methods is used to accept parameter as get or post. If we write get so will only able to accept get form data.
input = request.form this will pass all the data of submitted form in to input variable.
return render_template('user.html',data = input) the input data is passed in render_template with data that is accessible in the “user.html” file.
We can redirect by the parameter you pass in URL to the other methods by @app.route(‘/user/<type>’) here type is the URL parameter with you want to put condition. In the above method if the type is equal to form it will redirect the user to the form page.
Now create a html file “form.html”
<!DOCTYPE html>
<html>
    <head>
    <title>Flask Form</title>
    <link rel="stylesheet" href="{{ url_for('static', filename='style.css') }}"/>
    </head>
    <body>
        <div class="text-center">
            <h2>Signup Forms</h2>

            <form action="/submit" method="POST">
                <div class="form-group">
                    <label>Name</label>
                    <input type="text" name="name"/>
                </div>
                <div class="form-group">
                    <label>Qualification</label>
                    <input type="text" name="qual"/>
                </div>
                <div class="form-group">
                    <label>Experience</label>
                    <input type="text" name="exp"/>
                </div>
                <div class="form-group">
                    <input type="submit" value="submit"/>
                </div>
            </form>
        </div>
    </body>
</html>
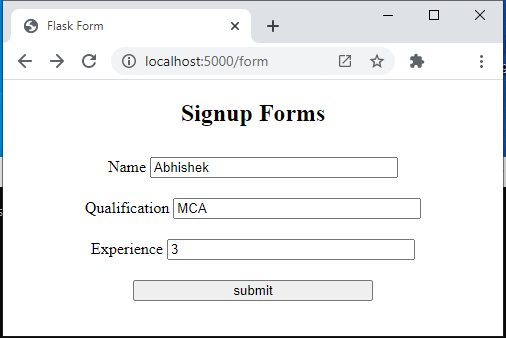
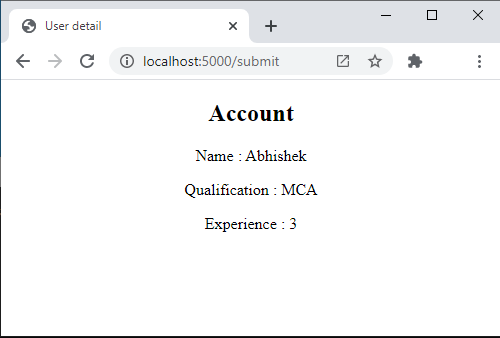
The form.html will post the data to the “localhost:5000/submit” url, this method will render all the data in user.html below file.

create a file “user.html”
<!DOCTYPE html>
<html>
    <head>
    <title>User detail</title>
    <link rel="stylesheet" href="{{ url_for('static', filename='style.css') }}"/>
    </head>
    <body>
        <div class="text-center account">
            <h2>Account</h2>

    <p> Name : {{data.name}} </p>
            <p>Qualification : {{data.qual}}</p>
            <p> Experience : {{data.exp}}</p>
        </div>
    </body>
</html>
These {{ }} braces is used to print the data in html file.
Keep practising copy all the code above and create the file as mention and put all the html file in “/templates” of the root directory of your project, stay with us we shared next tutorial very soon.
Happy Pythoning! ❤


